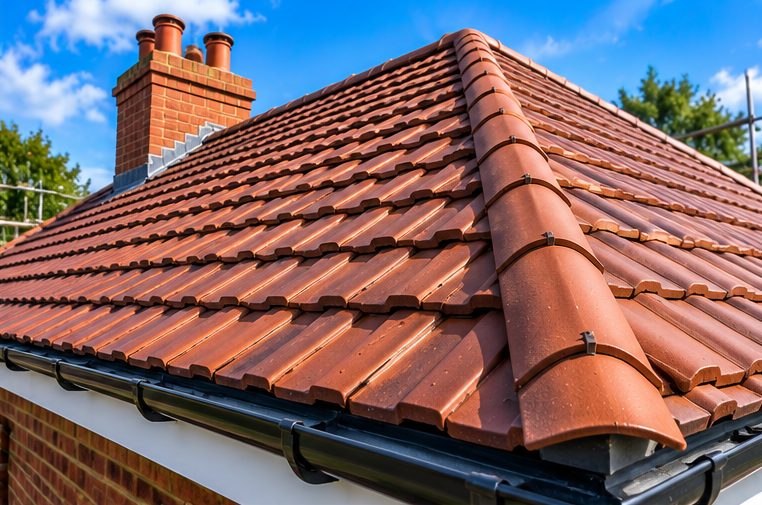
On any roof, water behaves well across open slopes and badly at the edges. Chimneys, side walls, dormer cheeks, valleys and roof windows are the places where covering meets something else, and each needs a purpose-made waterproof junction. Lead has been used for this for centuries because it can be shaped tightly and lasts well.
This guide to lead flashing installation is for Lincolnshire homeowners planning a new roof, an extension or a major re-cover. It describes where flashings are needed, how they are formed and fixed, and what to check when comparing quotations.
Walk around the outside of a house and you can count the junctions. A chimney stack has four sides, each needing its own treatment. A wall running up beside the roof, such as on an extension or a terrace, needs a stepped or continuous abutment flashing. Dormers have cheeks and a front apron, valleys collect water from two slopes, and roof windows such as a Velux sit in a surround that must shed water around the frame. Porches and bay roofs have similar joints where a lower roof meets a wall. On a new roof these should be planned alongside the covering, because the order of work matters: the flashing is built into the covering, not stuck on afterwards.
Sheet lead is cut to pattern, dressed by hand into the shape of the junction and held in place with clips or fixings so wind cannot lift it. The top edge is tucked into a chase cut into the brickwork, wedged and then pointed with mortar or sealed, while the lower edge lies over the covering. Long pieces are made in short lengths with overlaps to allow for the metal expanding and contracting through the seasons. If lead is laid in long unbroken sheets, it can crack. A neat result relies on correct laps, sound fixings and a clean, dry chase. Visible sealant alone is not a substitute for dressing the lead properly into the structure.
Chimneys are the classic leak spot, so they repay careful work. The usual build-up has a lower apron at the front, stepped flashings up each side, and a back gutter where the roof slope meets the rear of the stack. Soakers, small pieces of lead or similar material, may be interleaved with tiles or slates at the sides. Each piece overlaps the one below like fish scales. If the chimney is being repointed or rebuilt at the same time, new flashings should be planned with that work so the joints in the brickwork can take the new chases. Mention any past damp near the stack when you ask for a quotation, as it helps us look in the right place.
Several poor practices give lead a bad name. Using mortar fillets or bitumen strips in place of lead may look fine on the day, but they usually crack as the roof moves. Lead that is too thin for the position, or used in lengths that are too long, will split. Flashings that are not tied into the covering allow wind-driven rain to track behind them. Skipping the back gutter at a chimney is another frequent fault. When comparing quotations, ask what each includes, how the lead will be secured and whether the old flashing is being replaced or simply covered. Lead work is also visible to thieves, so it is worth asking about sensible protection on site.
The main factors are the number of junctions, the length of each run and the thickness, or code, of lead needed for the position. A simple lean-to wall is quite different from a chimney with four faces and a back gutter. Access plays a part, and scaffolding is generally needed for safe work at height, especially on taller buildings. Wall condition matters too, since crumbling mortar makes it harder to form a secure chase. If the flashing is part of a larger new roof, some access costs are shared, which can affect how the job is priced. A site visit lets us count the junctions and explain the specification clearly.
F H Roofing is based in Beckingham near Lincoln and covers Lincolnshire, including Boston, Grantham and Gainsborough. Use the phone or WhatsApp buttons on this page to start. Describe the roof, say which junctions you can see, whether you are planning a new covering and whether anything is leaking now. If you have plans for an extension, send them over, as it helps us think about the flashings early. We will arrange a free quotation, explain how the lead will be installed in plain terms and answer your questions before you commit to anything.
For lead flashing installation anywhere in Lincolnshire, call or WhatsApp 07561 405402, or use the form below and tell us about the job.
Pictures are for illustration purposes only.
See all New Roof Installations services in Lincolnshire →
Lead can be dressed tightly into the shape of a junction and tucked into the masonry, forming a mechanical waterproof barrier. Sealant alone tends to shrink and split as materials move. Sealant can support a detail, but it is not a replacement.
Usually it makes sense to renew them, since the covering needs lifting around the junctions anyway. Old lead may be fatigued or poorly fixed. We will look at what is there and tell you honestly whether it can stay.
Dry conditions suit the work, because the chases and surfaces need to be clean and dry for a good fix. Rain and strong wind make careful work difficult. Timing depends on the weather, so we plan around it rather than promise a fixed day.
Tell us about the job and we will be in touch.
Prefer to talk? Call 07561 405402 or WhatsApp us.